



Showing posts with label Fruit. Show all posts
Showing posts with label Fruit. Show all posts
Thursday, June 14, 2012
Celebrating.


Tuesday, June 12, 2012
Summer's on its way.


Early summer at its finest.
Monday, May 28, 2012
A patriotic breakfast.

Saturday, May 26, 2012
Queenie's Treasury
Happy Memorial Day weekend, my doves! Summer has announced itself in New York with an appropriately warm, overly-humid day, and so I'm spending the afternoon inside with an iced coffee. (And a pot of strawberry-rhubarb compote bubbling on the stove.) While I mop the humidity from my brow, let's take a look at this week's Treasury, shall we?
 I was thisclose to ending my subsrciption to Bon Appétit a year or so ago. I was riding out the tail end of the subscription Condé Nast had given me to fill up the issues remaining on my Gourmet tab, and I had been consistently underwhelmed. But then, in late 2011, they hired Adam Rapoport and went through their redesign, and I've been much happier with the magazine ever since. The recipes rarely rise to the level of Gourmet's, but the features have gotten much better - and are beautifully photographed. Case in point: this month's piece on interior designer John Derian, featuring his home in Provincetown. My brother and sister-in-law are in P-Town right now, and I hope they're eating as well as Derian's guests.
 I've always been more of an individual cocktail maker than a punch preparer, but this bourbon, strawberry and lime punch from the folks at Prime Meats might just push me along the path to transformation. I'm thinking it's definitely going to need to make an appearance at my brother's 30th birthday festivities in Maine this July, when strawberries will be at their peak in northern New England. Yes, indeed. Fellow guests: prepare yourselves.
 Now that Greenmarket season is back in full swing here in New York, I thought it was time to remind you all of the truly awesome blog Lucy's Greenmarket Report. Lucy visits the Union Square Greenmarket pretty much every day it's open, then posts a digest of what's available and what's on the way later in the week. If you're wondering if snap peas will be on hand yet, or if rhubarb is completely played out, Lucy's is the blog to check before heading out to shop for that dinner party.


Saturday, July 16, 2011

Wednesday, July 13, 2011
Berries & beans.
 On Saturday, I visited my little local Greenmarket outpost, where I grabbed a lovely mixed bouquet and...not much else. Yes, I bought a pint of lackluster tomatoes and snagged some decent Kirbies, but mostly I was disappointed in the selection of veggies. The only thing I bought that went beyond average? Green beans! I mixed them into a beet and green bean salad with dill, one of my summer favorites.
 I didn't need any berries, but they were awful pretty. Blueberries...
 ...and tart, tangy goosberries!
 So, instead of being a neighborhood loyalist, I'm heading back to Union Square this Saturday. I need peaches, you guys. And tomatoes and ur-cucumbers and corn and...you get the idea.
Tuesday, June 21, 2011
Crunchy and creamy.
 I don't buy watermelon terribly often. If I buy it already cut, it's insipid and soggy. If I manage to find a baby melon, it's a miracle. And a full-sized one is just...huge. It's six or seven pounds of deliciousness, but six or seven pounds of anything is a lot for one person.
But last week? Last week I gave in to temptation. It was hot as Hades (okay, only 99 degrees, but still), and all I could think about was watermelon. Cool, refreshing, lightly sweet watermelon. I ordered one from FreshDirect, knowing full well it would be ridiculously massive.
It was.
The first night, I cut off a slab and chopped it up to keep in the fridge, just like my mom used to do when we were little. I chopped off maybe a third, and it took me five days to eat. FIVE DAYS. So much watermelon.
So this weekend, I started thinking about other things I could do with the bounty. I've always had a thing for taking melon to a savory place (I think this fits in well with my love of cucumbers), and, especially, to a spicy place. I'll take pretty much anything to a spicy place, come to think of it. (Unintentional innuendo, for the record.)
 I mixed up a light dressing, half olive oil and half sherry vinegar, and added several glugs of Sriracha for heat. I chopped up some red onion and basil, cubed some watermelon, and added a sliced avocado for good measure. I mixed the whole lot a few times with a giant spoon and some salt. The watermlon released a healthy amount of juice, which mixed beautifully with the dressing, taking the edge off of the vinegar's tartness and leaving a depth and complexity I hadn't expected.
Between the distinctively different crunches of the onion and watermelon and the creaminess of the avocado, I was pretty much in heaven. And it was dang pretty, too.
Spicy Watermelon & Avocado Salad
2 tsp. olive oil
2 tsp. sherry vinegar
1 tsp. Sriracha (adjust to your liking)
2 cups watermelon, cut into 3/4-inch cubes
1 avocado, peeled, seeded and cut into 3/4-inch pieces
1/4 cup red onion, finely chopped
1/4 cup lightly packed basil leaves, finely chopped
Kosher salt
In a small bowl, whisk together the oil, vinegar and Sriracha. Add the remaining ingredients (except for the salt) to a medium bowl and gently mix together. Taste for seasoning and add salt and Sriracha as needed.
Serve immediately.
Serves two as a side.
Tuesday, January 18, 2011
Sunshine in a bowl.
 When I was in Austin, Nick & Louisa took me out to dinner at Uchi, a beloved Japanese restaurant on South Lamar. Before we began the incredibly delicious meal, our waiter brought us a small amuse: pomelo tossed with olive oil and topped with grey sea salt.
It was, in a word, marvelous. Pomelo is a bit milder than grapefruit and has a lovely sweet, sour and slightly tangy flavor. It's not a juicy citrus; instead, its texture is a bit springy, the pulpy flesh bursting in the mouth rather than dripping on the plate. It's a fruit chock-full of subtle flavors.
 On Sunday, by way of a snack, I decided to recreate the amuse here at home. Nothing could be easier, really. You slice off the pomelo's rather thick peel, trim the pith away from the flesh, and toss it in a bit of olive oil. Don't skimp on the salt - use the best, flakiest sea salt you have, and sprinkle a bit more of it than you think you need.
As a snack, a single pomelo serves one. As an amuse, it can serve three to four, depending on how skillfully you peel and de-pith the thing. Either way, it brightens a winter's day like little else can.
Monday, October 18, 2010
A crisp for the crispest of seasons.
 Fall is here, people. I, um, might have mentioned that before. Sorry for the redundant message, but I'm just so gosh-darned excited about it! Yesterday morning I visited the St. Stephen's Greenmarket to buy a healthy supply of apples for the week, with an eye to making a few different apple-y items over the next few days. (And, of course, I threw in a few apples for snacking purposes.)
This afternoon, I tackled the first of my projects: an apple crisp. Crisps, like cobblers and crumbles, are amongst the easiest of all desserts known to humankind. You basically slice up some fruit (or not, in the case of berries), mix it with a little sugar and spice, toss the lot into a buttered baking dish and then throw a sugar-and-butter-and-possibly-oats topping down over everything.
 And, kaboom! You have absolute, utter, fruity perfection. And your house will smell pretty damn good, too. Feel free to mess about with the ingredients here, especially the types of apples and the seasonings, depending on what you prefer. Cloves would be great, as would allspice. A little Calvados in place of the cider would make things pleasantly boozy, which is always a good thing. And light brown sugar will give you a more-golden, less-brown topping, and a slightly lighter flavor. Whatever floats your boat (or bobs your apple! Too much?)
Apple Crisp
1 1/4 cups oats (old-fashioned, not instant)
3/4 cups dark brown sugar, divided
1/2 cup flour
3/4 tsp. kosher salt, divided
1 1/4 tsp. cinnamon, divided
1/4 tsp. freshly grated nutmeg
1/2 cup chilled butter, cut into 1/2-inch chunks
2 lbs. assorted apples (I used honeycrisp and gala), peeled and cut into 1/2-inch slices
1 tbs. lemon juice
1 tbs. apple cider
Pre-heat the oven to 375 degrees Fahrenheit. Butter a 2-3 quart glass or ceramic baking dish and set aside.
In a medium bowl, combine the oats, 1/2 cup of the sugar, flour, 1/2 tsp. of the salt, 1 tsp of the cinnamon and the nutmeg. Add the butter and blend the mixture with your fingertips until it forms soft, uniform clumps. Set aside.
In another bowl, combine the apples with the remaining sugar, salt and cinnamon. Add the lemon juice and cider and toss to combine, until the sugar has dissolved and the apples are evenly coated.
Pour the apples evenly into the baking dish. Sprinkle the topping evenly over the apples. Place the dish in the oven and bake for 35-45 minutes, until the top of the crisp is well-browned, and the juices are dark and bubbly.
Serves 4-6. Goes really, really well with vanilla ice cream.
Tuesday, September 14, 2010
The madness continues.
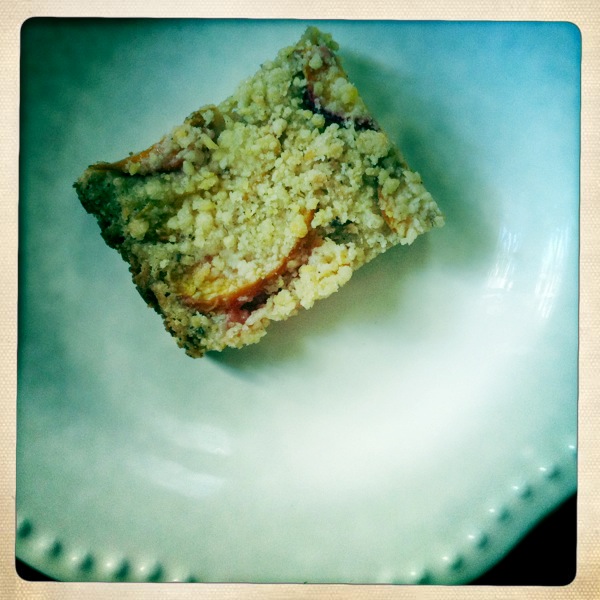 Last week, Smitten Kitchen posted a scrumptious looking recipe for peach shortbread. And you all know that when Smitten Kitchen says, "Jump," I say, "How high?"
I promptly scurried off to buy some late-season peaches, but I already had the other ingredients in-house. It's a remarkably simple recipe; the longest time commitment is waiting for the browned butter to cool.
 Yes, browned butter. Did I mention that these peach shortbread bars feature my favorite baking ingredient ever? Indeed.
So head on over to Deb's blog and hook yourself up with the recipe. And if peaches have already disappeared from your local market, go ahead and substitute plums, or even very thinly sliced sweet apples. I have a hunch that this recipe is remarkably adaptable.
Monday, August 16, 2010
This buckle goes fast.
 This photo was snapped outside my office at approximately 11:00 AM on Thursday.
I think it's safe to say that - at least when it comes to baked goods - I have some damn lucky coworkers. My 12th Floor colleagues routinely enjoy the fruits of my baking experiments, and said experiments have increased exponentially with summer's onslaught of obscenely tempting fruits. I've flirted with peach-plum cake and taken blueberry buckle for a spin, but my heart (and that of the 12th Floor as a whole) belongs to peach browned butter buckle.
That's right. Peaches. And browned butter. That sound you hear? It's me, dying happy.
I first discovered the concept via the ever-awesome Deb of Smitten Kitchen. She made her buckle in a super-picturesque (but not at all commute-friendly) cast-iron skillet, and I was, indeed, smitten. The cake combines two of my favorite things: tangy buttermilk and nutty browned butter. The topping does the same, with its copious amounts of peaches (Deb used nectarines, which would also be delicious.) and - again - browned butter.
However. The first time I brought this in, we thought there was just too much cake. Don't get me wrong - the cake part is truly delicious. But the fruit and the topping? They are the stars. They need a modicum of cake - it imparts dignity and allays the notion that you are simply slurping up peaches, sugar and butter - but they don't need quite so much.
And so, on the second go-round, I halved the amount of cake. The result? A moist, delicious, slumpy buckle. And one that went in record time. A vote of confidence if ever there was one.
Peach Buckle with Browned Butter
Adapted from Smitten Kitchen
For the cake:
1/2 cup unsalted butter, plus additional for greasing pan
3/4 cups flour
1 tsp. baking powder
1/2 tsp. salt
Small pinch of allspice
1/2 cup granulated sugar
1 egg
1/3 cup buttermilk
3/4 lb. peaches, pitted and cut into wedges (about 5 peaches)
1 tablespoon lemon juice
For the topping:
Reserved butter from cake (above)
1/2 cup granulated sugar
1/2 cup flour
1/4 tsp. cinnamon
Pinch of salt
Place the butter in a small saucepan or skillet set over medium-low heat. The butter will melt, then get foamy. Eventually, the butter will turn a golden color and then begin to brown. Stir the butter frequently as this happens, scraping up any bits that settle to the bottom. Once the butter is a warm brown color and smells nutty, remove from the heat. Pour into a heat-proof dish and place in the freezer to cool down. (This is a good time to slice your peaches!)
Make the cake:
Once the butter is close to room temperature, remove it from the freezer.
Place a rack in the middle of the oven and pre-heat the oven to 350 degreees Fahrenheit. Butter a 9-inch cake cake, then line the bottom with parchment paper. Butter the paper and set the pan aside.
In a small bowl, whisk together the flour, baking powder, salt and allspice. In a large bowl, whisk together half of the browned butter and the sugar. Add the egg and whisk to combine well. Using a spatula, stir in the buttermilk, then the dry ingredients. Mix until just combined.
Pour the batter into the prepare cake pan, and use the spatula to smooth it out and around, making sure you have any even layer over the bottom of the pan. Toss the peaches with the lemon juice and arrange the slices in concentric circles on top of the cake batter.
Top & bake the cake:
Stir together the remaining butter with the flour, sugar, cinnamon and salt until the mixture forms large and small crumbs. Sprinkle the topping evenly over the peaches.
Bake the cake for 30-40 minutes, until a tester inserted into the center comes out clean of cake batter (you'll still see some peach juice on the tester). Let the cake cool in the pan on a rack until just warm, or until completely cool. Serve warm or at room temperature. The cake keeps well overnight in its pan, sealed with plastic wrap.
Serves 8.
Tuesday, July 27, 2010
Apparently, I'm all about the peaches.
 Summer's bounty is everywhere these days. On trips to the market, I'm typically overwhelmed by the options on hand: berries, tomatoes, corn, melon, greens, stone fruit...they all abound, and, more often than not, temptation overwhelms my reason. I wind up with three pounds of peaches, or two pounds of plums, and I'm left - all alone - in my apartment, trying to figure out what to do with all of it before it goes bad on me.
This weekend, I decided to make a cake. As I often do when I am in need of inspiration, I headed over to Smitten Kitchen and did a little poking around. I searched for plum recipes, peach recipes, general stone fruit recipes...and hit the jackpot. I wanted something tasty that would showcase the peaches and plums I'd bought, but also be easy to get into the office the next morning. (I made a blueberry-nectarine buckle last week that nearly did me in on the subway.) Deb's dimpled plum cake seemed the perfect solution.
I didn't have enough peaches to make a lemon-and-peach version, so I went half and half: lemon with peaches and green plums. I was also out of light brown sugar, so I used dark - and loved the results. The cake was moist, with a fine crumb, and fragrant with lemon and molasses. And, true to expectations, it was remarkably easy to make and to transport - and, given that it was more or less gone by 1 PM, I'd say it was a hit at the office, too.
 What more could a girl ask for out of some Sunday afternoon interwebs poking-about?
Dimply Peach and Plum Cake
Adapted from Smitten Kitchen
1 1/2 cups flour
2 tsp. baking powder
1/4 tsp. salt
Scant 1/4 teaspoon ground cinnamon
5 tbs. unsalted butter, at room temperature
3/4 cup (packed) dark brown sugar
2 eggs
1/3 cup canola oil
Grated zest of 1 lemon
1 1/2 teaspoons pure vanilla extract
Two peaches and three plums, halved and pitted
Place a rack in the center of your oven and pre-heat to 350 degrees Fahrenheit. Butter and flour an eight-inch square baking pan, and place on a cookie sheet. Set aside.
Stir together the flour, baking powder, salt and cinnamon in a small bowl.
In the bowl of a stand mixer fitted with the paddle attachment (or using a hand mixer fitted with the beaters), beat the butter on medium speed until it is light and creamy, about three minutes. Add the sugar and continue to beat on medium speed, about three minutes more, until the mixture is light, fluffy and uniform. Add the eggs one at a time, beating well to incorporate fully after each addition.
Beat in the oil, zest and vanilla, then reduce the speed to low and add the dry ingredients in two or three batches. Using a spatula, give the bowl a good swipe around the edges to make sure the batter is uniform. Pour into the prepared pan.
Arrange the plums and peaches prettily, cut-side up, in the batter. Jiggle them a bit to make sure their tops are even with the top of the batter.
Bake for 30-40 minutes, checking every five minutes past twenty to see how you're doing. When a knife or tester inserted into the middle of the cake comes out clean, you're done.
Set the cake on a rack to cool for at least fifteen minutes. (This will also give the fruit juice that's come out of the plums and peaches to seep into the cake.) When you're ready to serve the cake, run a knife around the edge and invert it onto a plate, then back onto a final plate. (In other words, serve fruit-side up.)
Serves 8.
Monday, July 26, 2010
Perfect pancakes...and peaches.
 A couple of years ago, during my annual visit to Nick and Louisa, we ate the most delicious pancakes I have ever tasted. They come to us - unsurprisingly - courtesy of the amazing Ruth Reichl, who added her own personal pancake recipe to the Gourmet cookbook. Their marvelous texture and flavor come mainly from an exorbitant amount of butter in the batter and from being cooked as pancakes should be: gently, in just enough fat, over a moderate flame.
In fact, no matter the recipe, those are the basic principles to making a quality pancake. Too many of us let the skillet get too hot, or fail to wipe it down between batches. Doing so results, respectively, in burned outsides and raw insides, as well as a smoky, gritty mess of a pan. By following a few simple steps, we can all avoid the dreaded "first pancake" syndrome, and turn out perfect specimen after perfect specimen.
First of all: use enough oil, but not too much. If you are using a non-stick skillet, you want only the thinnest film of oil, about half a teaspoon per batch for a large (8 to 12 inch) skillet. For a standard skillet, use just a bit more; you should be able to swirl the oil around a bit - but just a bit.
 Keep the heat moderate; when you drop your batter into the pan, it should hiss slightly and not stick, but it should brown slowly to a golden hue, not quickly to dark brown or black. Just keep an eye on it; if the edges of your pancakes bubble rapidly immediately, the pan is too hot. Don't be precious about adjusting the heat as you go; the pan will change in temperature as you add or remove pancakes to it. You must compensate by adjusting the flame.
Wipe out the pan between batches, and add fresh oil. If things have gotten really sticky and icky, use a bit of water to get the brown bits up from the bottom before wiping with a paper towel.
Finally, pay attention! Pancakes are not something you can walk away from. Watch how they bubble, how they firm up around the edges; they will not cook on a perfect schedule, so you must pay attention to them and flip them according to their own time.
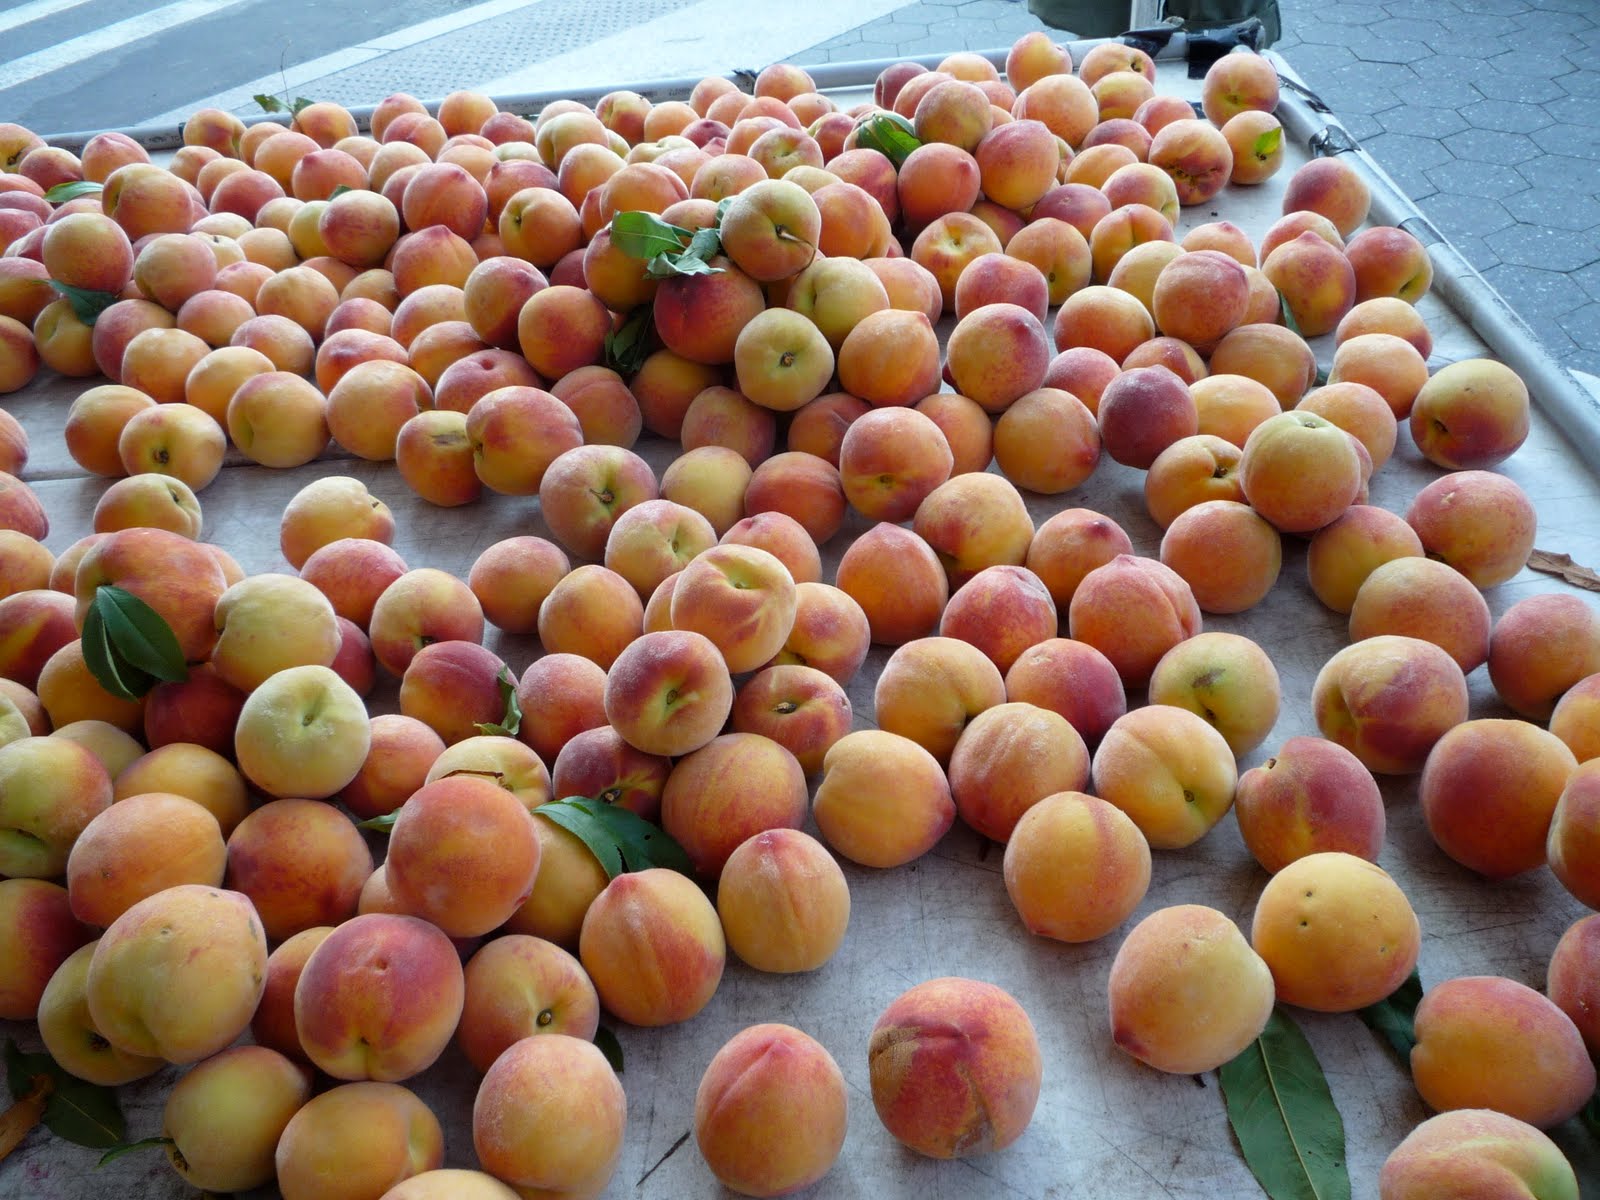 Now that you know how to make pancakes in general, why not try these in particular? I've taken Ruth's superlative version and riffed on it a bit; the butter has been browned, and I've added chopped fresh peaches to the mix, in a nod to a) the season, and b) the fact that I didn't have any blueberries in the house this morning.
I hope you enjoy them!
Browned Butter Pancakes
Adapted from the Gourmet Cookbook
1 cup buttermilk (plain old milk will work, too)
2 eggs
3 tbs. canola oil
8 tbs. (1 stick) unsalted butter
1 cup flour
4 tsp. granulated sugar
4 tsp. baking powder
1 tsp. salt
3-4 ripe peaches, peeled, pitted and cut into 1/2-inch cubes
Additional canola oil, for cooking
In a small skillet or saucepan set over medium heat, melt the butter. Continue to cook just until the butter turns slightly brown and smells nutty. Set aside until cool.
In a small bowl, whisk together the buttermilk, eggs and oil, then whisk in the cooled, browned butter. In a medium bowl, stir together the flour, sugar, backing powder and salt. Stir in the milk mixture until just combined.
Heat 1/2 teaspoon or so of oil in a large skillet over moderate heat until hot but not smoking. Working in batches of two, pour 1/2-cup measures of batter into skillet. Drop five or six peach cubes into each pancake and cook until bubbles have formed on top and broken, about two minutes.
Flip pancakes with a spatula and cook until undersides are golden, about a minute or two longer. Remove from the pan to a warmed plate. Wipe out the skillet between batches, adding oil for the next batch to the clean skillet. Continue until all the batter has been turned into pancakes!
Makes about eight pancakes.
Friday, July 23, 2010
Oh. Em. Gee.
 The march of the peaches continues, my friends, and I couldn't be happier about it. Last week, I spotted a recipe for peaches poached in wine and basil over at Food52 and instantly intrigued. I've always been more of a baker than a poacher, but something about the simplicity of the recipe (wine, basil, sugar, water, peaches) called to me.
The fact that I'd bought two pounds of peaches to no particular end might also have had something to do with it.
Regardless of motivation, the fact remains that I decided to make the poached peaches on Sunday afternoon. I tweaked the recipe in the smallest way (using rosé instead of white wine, since it's what I had on hand), but the results were still heavenly.
After only a few minutes of poaching (and a very easy peel), the peaches were even more luscious and heady than they'd been in their raw form. The syrup heightened their sweetness, and the slow poaching process coaxed the peaches from delightfully ripe to lusciously, sensually soft. The rosé wine lent itself to a rosier syrup than I'd expected, delicately scented with basil. Its remainders will, no doubt, make for amazing cocktails.
Guys, I gotta tell you: this is pretty much the sexiest dessert ever. For reals.
Enjoy. (Insert lascivious wink here.)
Peaches Poached in Wine and Basil
Adapted from TheRunawaySpoon on Food52
1 cup (dry) rosé wine
1 1/2 cups water
1 1/2 cups granulated sugar
1 large bunch basil (about two cups' worth of leaves)
6 ripe yellow peaches
Place the wine, water and sugar into a wide-bottomed saucepan and stir to dissolve the sugar a bit. Bring to a boil over medium heat, and continue to boil for five minutes. Turn the heat down and allow the syrup to simmer gently while you halve the peaches.
Cut the peaches in half and gently remove the pits. This can be a delicate undertaking, depending on how ripe the peaches are. Add half the basil leaves to the syrup, then place the peaches in the pan, cut side down. (If all of your peaches don't fit in one go, you can do multiple rounds.)
Poach the peaches cut side down for about three minutes, then turn them (I used my fish spatula) over and poach for an additional three or four minutes. When pricked with a knife, the peaches should give way easily.
Using a slotted spoon, remove the peaches to a plate. Add any peach juices from the cutting board to the pan, along with the remaining basil. Bring the syrup to a boil and cook until reduced by half. Pour in any juices that have collected from the peaches, and let cool to room temperature.
Serve the peaches drizzled with the syrup; whipped cream or vanilla ice cream would also be lovely. Reserve most of the syrup for use in cocktails. Trust me.
Serves six.
Tuesday, July 20, 2010
Easy as tart.
 I think I might have mentioned how much I love blueberries. And how much I love peaches. What, therefore, could be better than a recipe that combines the two into one delicious whole? Not a whole lot.
I'm a big fan of peach-blueberry pie, made with mountains of peaches and a very few berries, but I wasn't thinking far enough ahead to such a creation when I did my marketing last Saturday. The result? A pint of gorgeous, plump blueberries, and two small peaches left over from half a week of snacking on their companions.
 The solution? A recipe for a smallish, easy-to-make tart that emphasizes the berries, treats the peaches as a luscious garnish and generally busts any myth claiming that pastry is tricky to prepare. You can use your food processor to make the dough, which you then press into the pan. No rolling means no flour-strewn counters. This recipe is a one-paper-towel-clean-up kind of deal, friends.
Hope you like it!
Simple Blueberry-Peach Tart
For the crust:
1 1/4 cups flour
1/4 cup sugar
1/4 tsp. salt
1 stick (1/4 lb.) very cold butter (cut into bits)
1 egg yolk
For the filling:
1 pint blueberries
Juice of half a lemon
Scant teaspoon of cinnamon
2 tbs. turbinado sugar, divided
1/8 tsp. salt
2 peaches, sliced
1 tbs. milk or cream
Lightly whipped cream, for serving
Place the flour, sugar, salt and butter in the bowl of a food processor fitted with the blade attachment. Pulse until the mixture resembles a coarse meal. Add the yolk and pulse a few more times, until the mixture becomes to come together.
Dump the dough into the middle of a tart pan (I use my eight by ten inch rectangular tart pan; you can also use a nine or ten inch circular pan.). Using your hands or the flat bottom of a measuring cup, press the dough evenly into the bottom. Press the dough up the sides to the rim of the pan and set the tart pan on a baking sheet. Refrigerate the dough-lined pan for 30 minutes.
Place a rack in the center of the oven and pre-heat it to 375 degrees Fahrenheit. Meanwhile, mix the blueberries, lemon juice, cinnamon and one tablespoon plus one teaspoon of the sugar together in a medium bowl. Allow to sit while the oven pre-heats. Once the oven is ready, remove the tart shell from the fridge and pour the blueberry filling into it, distributing evenly.
Place the peach slices on top of the berries, arranging them evenly over the top of the tart. Sprinkle the entire tart with the remaining sugar and lightly brush the exposed crust with the cream. Place the tart in the oven and bake until the berries are bubbling and the crust is golden, about 25-35 minutes depending on your oven's personality.
Cool on a rack until nearly cool before serving. You can also cool the tart completely, cover it well with plastic wrap, and serve it the next day. (Note: if you are in an area with a lot of humidity, the crust may soften a bit overnight. It's still tasty, though!) Serve topped with whipped cream.
Serves six.
Monday, July 19, 2010
Dispatch from the field: Union Square Greenmarket.
 July is a time of exceptional beauty at the Greenmarket. Tomatoes are finally out in full force, and bell peppers are popping up, too. Raspberries, blueberries and blackberries are parading through the stands.
 Did I mention the peppers? These little Hungarian guys were all over the place last weekend, just begging to be mixed into a stir fry or chopped into a salad.
 And stone fruit! Tiny, perfect, sweet-tart plums were everywhere, as were nectarines and peaches. Large, purple-skinned plums can't be far behind.
 Tomatoes again, but I couldn't leave you without a last shot of the colorful goodness.
Thursday, July 8, 2010
Get thee a galette!
 Berry season is in full swing here in New York, which means fresh blueberries are abundant. The berries are at the height of their goodness: they're firm and sweet and just a tad tart. And while berries from southern New England and the Midatlantic don't get the magnificently wild tang that graces berries from Maine, ours are still pretty darn good.
When faced with a pile of in-season fruit of any variety, my first instinct, typically, is to bake a tart. This time around, it's a blueberry galette, a free-form tart very similar to the strawberry-rhubarb crostata I made back in the beginning of June. Instead of individually sized tarts, here I've made one large dessert to serve a group of four or five, but it's just as easy to make as the crostata, and just as fun to eat.
I've seasoned the tart with my favorite combination for blueberries: sugar, vanilla and cinnamon, along with a dotting of butter and a hint of salt. The butter and vanilla lend the berries richness, while the cinnamon adds a spice to heighten their tart nature. Once you add all that, you will, of course, need a bit of sweetened whipped cream to cut through it.
Am I right?
Blueberry Galette
For the pastry:
1 1/4 cups flour
1/4 cup polenta
2 tsp. granluated sugar
1/4 tsp. salt
1 stick butter, very cold or frozen, cut into 1/2-inch bits
3 tbs. ice water
For the filling:
1 pint of blueberries, rinsed and dried
2 tbs. turbinado sugar
1/2 tsp. cinnamon
1/2 tsp. vanilla
1/8 tsp. salt
1 tbs. butter, cut into 1/4-inch bits
1 egg, beaten with a tablespoon of cold water
Sweetened whipped cream, for serving
Place the flour, polenta, sugar salt and butter in the bowl of a food processor fitted with the blade attachment. Pulse together until the mixture is mealy and most of the butter is about the size of small peas. With the processor running, stream the water in one teaspoon at a time until the mixture begins to come together in one or two big clumps. You may not need all the water, depending on the humidity in your ingredients and the air. (Alternately, you can make the pastry in a medium bowl, using a pastry blender. A food processor is super-fast, but a pastry blender works well, too. Make sure to chill the bowl ahead of time.)
Turn the dough out onto a lightly floured surface and mold into a large disc. Wrap in plastic wrap and place in the refrigerator. Let the dough rest for at least an hour; it can sit in the fridge for up to 36 hours before you use it.
When you're ready to make the filling and bake the galette, take the dough out of the fridge and let it sit; this will help take the chill off a bit. Pre-heat the oven to 375 degrees Fahrenheit. Place the blueberries in a medium bowl and add the sugar, cinnamon, vanilla and salt. Toss to combine evenly, and set aside while you roll out the pastry.
Lightly flour a piece of parchment paper and place the dough in its center. Flour your pin and use it to whack the disk of pastry once or twice, then start rolling it out from the middle outward, spinning it if you need to, until you have a roughly circular shape about 1/4 inch thick. Transfer the crust (on the parchment paper) to a cookie sheet.
Spoon the filling into the middle of the tart, leaving about two inches of crust as a border. Starting anywhere you'd like, fold the pastry up over the filling. Continue to fold in triangles as you go around the tart (Refer to the photo above; it's easy to do once you take a look at a finished version, I think.) until all the edges are folded over the filling, leaving a nice circle of pretty fruit exposed. Using a pastry brush, paint the crust with the beaten egg; this will give it a nice sheen. Dot the exposed filling with the butter.
Place the tart in the oven and bake for 25-35 minutes, depending on your oven, rotating the tart halfway through baking. Bake until golden-brown and bubbly; the crust may leak some juices, but should hold up pretty well in any case, despite the liquid. Once the tart is done, remove it from the oven and transfer it, on its parchment paper, to a cooling rack. Cool close to completely before slicing. Serve topped with whipped cream.
Serves four to five, generously.
Sunday, July 4, 2010
Getting in the spirit, Greenmarket-style.
 Even the Greenmarket was patriotic this weekend.
  Between the blueberries, raspberries, sweet cherries and red and white currants, it was a veritable playground for those eager to bake a flag cake, cherry pie, or berry tart. (I'm among that last group there. Recipe for blueberry galette, coming up!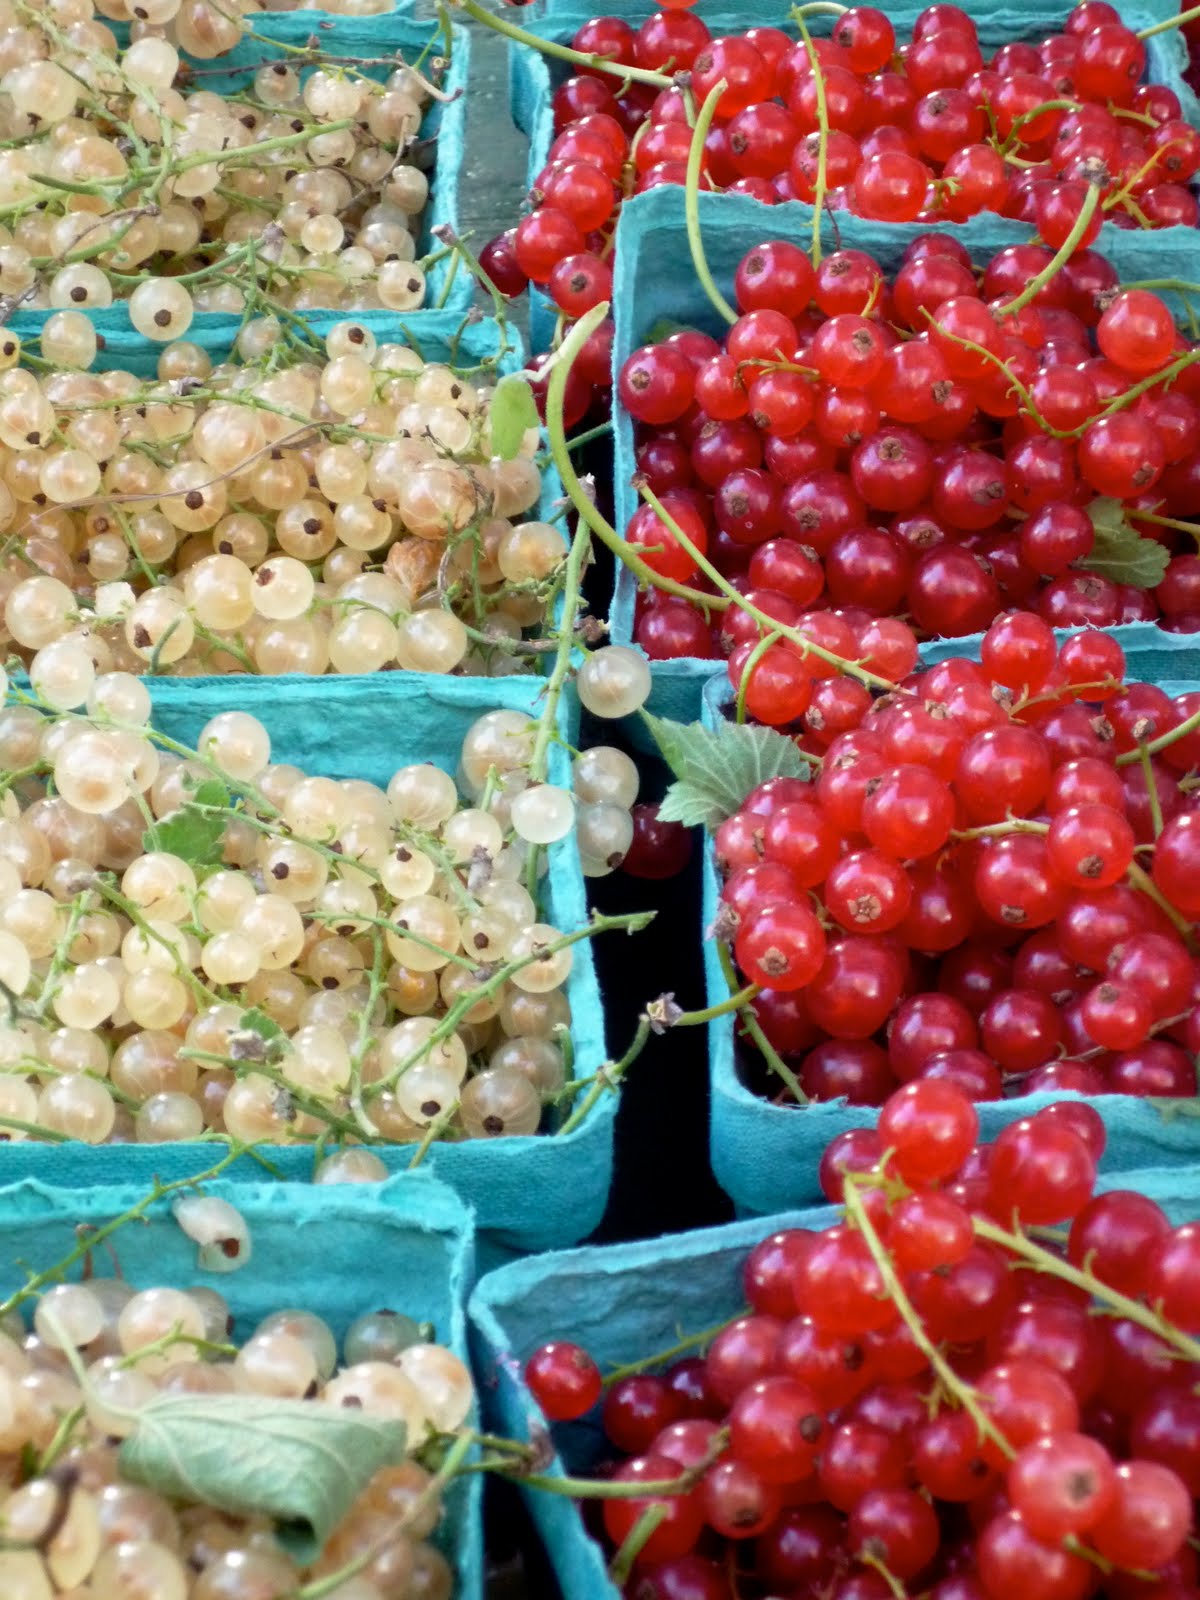
Friday, July 2, 2010
Last gasp.
 Strawberry season is drawing to a close.
 I actually couldn't believe how plentiful the berries still were last Saturday, and I was glad for it. Late-season berries tend to be sweeter and gushier; they're basically sugar held loosely together by vitamin C and strawberry seeds.
You have to eat them the day you buy them, lest they turn into strawberry booze overnight, but that's okay. After all, how could you ever resist?
Maybe there will be some tomorrow, too. Mmmmm...
Monday, June 28, 2010
Marketing, Ohio-style.
 Sandusky, Ohio doesn't have a plethora of amazing restaurants (though there are some notable spots, no doubt) or a hopping nightlife, but you know what it does have? Seriously good produce. Louisa and I visited a number of different markets over the course of the week I spent there, and all yielded some good goodies.
At Louisa's perennial favorite, Kramer's Farm Market in Norwalk, we found delicious asparagus, which we promptly seasoned with olive oil, salt and pepper and grilled for dinner.
At the Sandusky farmers' market, held downtown on Fridays and Saturdays, we found sweet cherries, snappy green beans and gorgeous beefsteak tomatoes. We used the latter two in our salade Niçoise.


 Last, but not least, the North Union Farmers' Market in Crocker Park. We arrived a little late (prime time seems to be between nine and ten in the morning), but still managed to find some plum, juicy sugar snaps, along with some green onions for grilling.
 I suppose I shouldn't be surprised; the Midwest is, after all, the bread basket of the States. The irony is, of course, that so much of what's produced there is consequently shipped off to the rest of us, or used in processed foods. These three markets, though, are doing their part to share the local bounty with, well, the locals - and that's a damn good thing.
Subscribe to:
Posts (Atom)


